Alpine Linux on Oracle Cloud
2019-10-06T06:30:49.236Z.
Changelog:
- 2020-05-03T14:54:36.284Z: Updated for UEFI support.
- 2023-01-14T16:59:40.796Z: Fixed incorrect command, added the use of Cloud Shell.
Oracle Cloud Free Tier allows user to run several types of virtual machines for free. At the time of writing, Oracle provides limited number of Linux-based images (CentOS, Oracle Linux, and Ubuntu). This article describes the installation of Alpine Linux on Oracle Cloud.
Create a Linux-based instance
First create a Linux-based instance, for example, using the CentOS 7 image. Enable the option which assigns a public address to the instance so that you can access it through SSH.
Once the instance is ready, login the instance using SSH.
Download and boot from Alpine Linux ISO image
On the instance, download the Alpine Linux ISO image. For example:
curl -O 'http://dl-cdn.alpinelinux.org/alpine/v3.10/releases/x86_64/alpine-virt-3.10.2-x86_64.iso'
The URLs of ISO images can be found on the official Alpine Linux download page.
https://alpinelinux.org/downloads/
Once the ISO image has been downloaded, write the ISO image to the disk. First identify the disk name. Run:
lsblk
The output should be similar to the following:
NAME   MAJ:MIN RM  SIZE RO TYPE MOUNTPOINT
sda      8:0    0 46.6G  0 disk
├─sda1   8:1    0  512M  0 part /boot/efi
├─sda2   8:2    0    8G  0 part [SWAP]
└─sda3   8:3    0 38.1G  0 part /
Write the ISO image to the disk /dev/sda:
dd if=alpine-virt-3.10.2-x86_64.iso of=/dev/sda
After the ISO image has been written, disconnect from the instance.
Connect to serial console
Connect to the serial console of the instance. This allow you to manage the instance during the Alpine Linux installation process. The connection can be made using the Cloud Shell or instance console connection.
Using Cloud Shell is more convenient if you have the correct permissions.
On the other hand, when creating the instance console connection to connect to the instance, you will be asked to provide the public key of a keypair. You may need to specify the corresponding private key when connecting to the serial console connection. For example:
ssh -i ~/.ssh/opc.rsa \
  -o ProxyCommand='ssh -i ~/.ssh/opc.rsa \
    -W %h:%p \
    -p 443 \
    ocid1.instanceconsoleconnection.oc1.ap-tokyo-1.aaaaa@instance-console.ap-tokyo-1.oraclecloud.com' \
  ocid1.instance.oc1.ap-tokyo-1.bbbbb
Replace ~/.ssh/opc.rsa with the path of the private key.
Once connected to the instance through the console connection, you should be able to see the login prompt. For example:
CentOS Linux 7 (Core)
Kernel 3.10.0-1062.1.1.el7.x86_64 on an x86_64

opc001 login:
Install Alpine Linux
Now in the instance details page, click the Reboot button. Through the console connection, you should be able to see the system being rebooted.
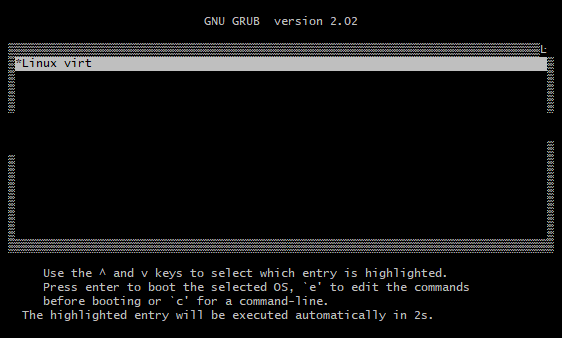
Alpine Linux will be running from RAM. Login as root. Copy required files from the ISO image, which are on the disk, into RAM.
mkdir /media/setup
cp -a /media/sda/* /media/setup
mkdir /lib/setup
cp -a /.modloop/* /lib/setup
When the files have been copied. Unmount the disk.
/etc/init.d/modloop stop
umount /dev/sda
Move the copied files to the appropriate location.
mv /media/setup/* /media/sda/
mv /lib/setup/* /.modloop/
Run the following commands to setup the keyboard layout, hostname, network interface, timezone, and package repositories:
setup-keymap

setup-hostname
rc-service hostname restart

setup-interfaces -a
rc-service networking start
rc-update add networking boot

setup-timezone
setup-apkrepos
Set root password:
passwd
Before setting up the disk, install several required packages:
apk add grub-efi
apk add efibootmgr
Set the boot and swap partition size:
# The boot partition size is set to 512MB.
export BOOT_SIZE=512
# The swap partition size is set to 1024MB.
export SWAP_SIZE=1024
Use GRUB as the bootloader as it is required for booting the system with UEFI:
export BOOTLOADER=grub

# The following makes sure grub-efi is used as the bootloader.
export USE_EFI=1
Now setup the disk:
setup-disk /dev/sda
During the installation, choose sys mode. The procedure should look like the following:
The following disk is selected:
  sda   (53.7 GB ORACLE   BlockVolume     )
How would you like to use it? ('sys', 'data', 'lvm' or '?' for help) [?] sys

WARNING: The following disk(s) will be erased:
  sda   (53.7 GB ORACLE   BlockVolume     )
WARNING: Erase the above disk(s) and continue? [y/N]: y

Partition #1 contains a vfat signature.
Partition #2 contains a swap signature.
Creating file systems...
mkfs.fat 4.1 (2017-01-24)
Installing system on /dev/sda3:
Installing for x86_64-efi platform.
Installation finished. No error reported.
100% ############################################==> initramfs: creating /boot/initramfs-virt
Generating grub configuration file ...
Found linux image: /boot/vmlinuz-virt
Found initrd image: /boot/initramfs-virt
done

Installation is complete. Please reboot.
Now reboot the system.
reboot
After the system is rebooted, you can connect to the instance again through SSH, and the console connection can be deleted.
References
- https://docs.cloud.oracle.com/iaas/Content/Compute/References/serialconsole.htm
- https://wiki.alpinelinux.org/wiki/Replacing_non-Alpine_Linux_with_Alpine_remotely
- https://wiki.alpinelinux.org/wiki/Setting_up_disks_manually
- https://wiki.alpinelinux.org/wiki/Alpine_setup_scripts
- https://wiki.alpinelinux.org/wiki/Filesystems
- https://docs.alpinelinux.org/user-handbook/0.1a/Installing/manual.html
- https://gitlab.alpinelinux.org/alpine/alpine-conf/-/blob/23427c5d/setup-disk.in